Why Do Car Window Tint Bubbles Form?
Before fixing window tint bubbles, it’s critical to understand their root causes. This knowledge helps you choose the right repair method and avoid making the problem worse. The most common reasons for tint bubbles include:
1. Poor Installation (The #1 Cause)
Most tint bubbles stem from improper installation. If the installer fails to thoroughly clean the window surface before applying the tint, dust, dirt, or oil particles can get trapped between the film and the glass—creating permanent bubbles. Additionally, rushing the installation process (e.g., not fully squeezing out air or moisture during application) leaves pockets of air that expand over time, especially when exposed to heat. Inexperienced installers may also use the wrong tools or techniques, such as incorrect刮板 angle or insufficient heat for curved windows, leading to poor adhesion.
2. Low-Quality Tint Film or Adhesive
Cheap, low-quality tint films use unstable adhesives that break down quickly under sunlight and temperature changes. These adhesives can shrink, separate, or degrade over time, causing the film to lift and form bubbles. Unlike high-quality films (such as ceramic or magnetic sputter films) that have durable, heat-resistant adhesives, low-grade dyed films often start bubbling within 2-3 years of installation. Poor adhesive quality is especially problematic in hot climates, where prolonged sun exposure accelerates degradation.
3. Trapped Moisture or Air
During installation, small amounts of moisture or air can get trapped under the tint film. In most cases, minor moisture bubbles will dry up and disappear on their own within 1-2 weeks as the film cures. However, if the installer doesn’t properly squeeze out excess moisture or air, these pockets can become permanent. Rapid temperature changes (e.g., moving from a hot garage to cold outdoor air) can also cause trapped air to expand, making bubbles more noticeable.
4. Environmental Factors and Wear
Prolonged exposure to extreme heat, direct sunlight, or harsh weather can damage the tint’s adhesive and film. For example, parking your car in direct sunlight for hours every day can cause the film to expand and contract, weakening the bond with the glass. Additionally, using ammonia-based cleaners or abrasive tools on the tint can break down the adhesive, leading to bubbling and peeling. Rear windshield defroster wires can also contribute—long-term use of defrosters heats the glass unevenly, accelerating adhesive aging and causing bubbles around the wires.

How to Fix Car Window Tint Bubbles: Step-by-Step Solutions
The right repair method depends on the type of bubbles (air, moisture, or dust) and their severity. Below are proven solutions for both DIY repairs and professional fixes.
DIY Repairs for Minor Bubbles (Air or Moisture)
If your bubbles are small (less than 1 inch) and caused by trapped air or moisture (common in new tint jobs), you can fix them at home with simple tools. Here’s how:
Tools You’ll Need:
-
Small pin or needle (for releasing air/moisture)
-
Plastic squeegee (or a credit card, wrapped in a soft cloth to avoid scratching the tint)
-
Hair dryer or heat gun (low heat setting)
-
Microfiber cloth
-
Isopropyl alcohol (for cleaning)
Step 1: Clean the Tint Surface
Start by cleaning the area around the bubble with a microfiber cloth and isopropyl alcohol. This removes dirt and oil that could prevent the tint from re-adhering to the glass.
Step 2: Apply Heat to Soften the Tint
Set your hair dryer or heat gun to the lowest heat setting and hold it 6-8 inches away from the bubble. Heat the area for 30-60 seconds to soften the tint film and its adhesive—this makes it easier to manipulate without damaging the film.
Step 3: Release Trapped Air or Moisture
Gently pierce the edge of the bubble with a pin or needle (be careful not to scratch the glass). For air bubbles, gently press the bubble with your finger to push the air out through the small hole. For moisture bubbles, allow the moisture to escape naturally—you may need to leave the car in a well-ventilated area for a few hours after piercing.
Step 4: Smooth the Tint
Use the plastic squeegee (or wrapped credit card) to smooth the tint from the center of the bubble outward toward the edge. Apply gentle, even pressure to ensure the tint adheres firmly to the glass. Wipe away any excess moisture or adhesive with a microfiber cloth.
When to Call a Professional (Major Bubbles or Dust Traps)
If your bubbles are large (more than 1 inch), caused by trapped dust or dirt, or if the tint is peeling at the edges, DIY repairs are unlikely to work. In these cases, it’s best to visit a professional tint shop for repairs or replacement. Here’s why:
-
Dust or dirt bubbles: These form when debris is trapped between the tint and glass during installation. The only way to fix them is to remove the old tint, thoroughly clean the glass, and reapply a new film.
-
Large or widespread bubbles: These often indicate a failing adhesive or low-quality film. A professional can safely remove the old tint without damaging the glass, then install a high-quality film using proper techniques.
-
Peeling tint: If the tint is lifting from the edges, it’s a sign that the adhesive has failed. A professional will remove the old film, clean the glass, and apply a new tint with a durable adhesive.
Professional tint shops also have access to specialized tools (such as heat guns and professional squeegees) and high-quality films that ensure a bubble-free finish. Many reputable shops offer warranties on their work, so you can have peace of mind knowing your tint will last.
How to Prevent Car Window Tint Bubbles (Long-Term Solutions)
Preventing tint bubbles is far easier (and cheaper) than fixing them. Follow these expert tips to keep your window tint smooth and bubble-free:
1. Choose High-Quality Tint Film
Invest in a high-quality tint film from a reputable brand. Look for films with durable, heat-resistant adhesives (such as ceramic or magnetic sputter films) that can withstand extreme temperatures and UV exposure. While high-quality films cost more upfront, they last 5-8 years (compared to 2-3 years for cheap dyed films) and are much less likely to bubble. Ask your tint shop for films with a warranty that covers bubbling or peeling.
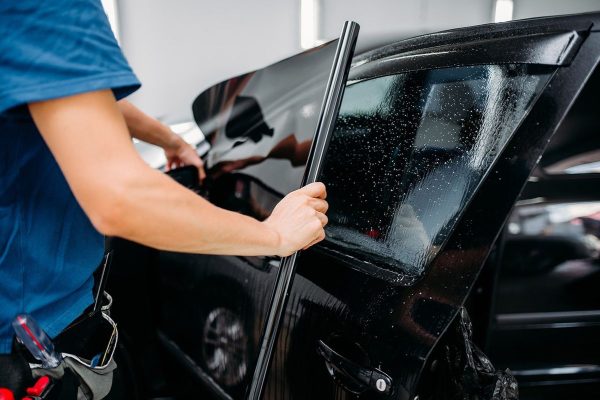
2. Hire a Professional Installer
The most important step in preventing bubbles is choosing an experienced, reputable tint installer. Look for shops with positive reviews, a clean work area, and certified technicians. A professional installer will: Thoroughly clean the glass (using multiple steps to remove dirt, oil, and debris) before applying the tint.Use proper tools and techniques to squeeze out all air and moisture during installation.Apply the right amount of heat to curved windows to ensure a tight, even fit.Avoid DIY tint jobs or cheap, uncertified installers—they often cut corners, leading to bubbles and premature tint failure.
![]()
3. Follow Post-Installation Care Instructions
Proper aftercare is crucial to help the tint cure properly and avoid bubbles. Most tint shops recommend: Avoiding rolling down the windows for 2-3 days after installation (this prevents the tint from lifting).Keeping the tint dry for 3-7 days (no car washes or cleaning).Not using the rear defroster for 1-2 weeks (this prevents uneven heating that can damage the adhesive).Avoiding ammonia-based cleaners—use only mild soap and water or tint-specific cleaners to clean the tinted windows.4. Protect Your Car from Extreme HeatProlonged exposure to direct sunlight and extreme heat is one of the main causes of tint bubbling. To protect your tint:Park your car in the shade whenever possible (e.g., under a tree or in a garage).Use a sunshade to block direct sunlight from hitting the windows.Avoid leaving your car in extreme heat for extended periods (e.g., during midday in hot climates).5. Regularly Inspect and Maintain Your TintCheck your tinted windows regularly for signs of bubbling, peeling, or fading. Catching small bubbles early allows you to fix them before they become larger or more severe. Clean your tinted windows gently with a soft microfiber cloth and mild cleaner to avoid damaging the adhesive. If you notice any issues, contact your tint shop immediately—many offer free or low-cost repairs for under-warranty work.
FAQs About Car Window Tint Bubbles
Q: Will small bubbles in new tint go away on their own?
A: Yes, small moisture bubbles in new tint (installed within the last 1-2 weeks) often dry up and disappear as the film cures. However, if the bubbles are caused by air or dust, they will not go away on their own and require repair.
Q: Can I fix tint bubbles with a hair dryer?
A: Yes, a hair dryer (on low heat) can be used to soften the tint and adhesive, making it easier to squeeze out trapped air or moisture. Just be careful not to use high heat, as this can damage the tint film.
Q: How long does window tint last without bubbling?
A: High-quality tint film installed by a professional can last 5-8 years without bubbling. Low-quality films or poor installation can cause bubbling within 1-2 years.
Q: Is it worth replacing bubbled tint?
A: Yes, if the bubbles are widespread, obstruct your visibility, or indicate a failing adhesive, replacing the tint is worth it. Bubbled tint not only looks bad but also loses its UV protection and heat-reduction capabilities.
Final Thoughts
Car window tint bubbles are a common frustration, but they’re not unavoidable. By understanding the causes (poor installation, low-quality film, trapped air/moisture, and environmental damage), you can choose the right repair method and take steps to prevent future bubbles. Remember: investing in high-quality film and a professional installer is the best way to ensure your tint stays smooth and functional for years. If you’re dealing with bubbled tint, assess the severity—small bubbles can be fixed at home, while large or persistent bubbles require professional attention.
Keep your car looking sleek and protected with these expert tips for fixing and preventing window tint bubbles. Your tint will thank you!